
DevLog #4 – One mesh library generator to quickly craft gridmaps
Hello everyone!
Last devlog, we showed the pixel art look we get in our 3D world. Let’s talk this week about how we make our levels!
In project “Stasis”, we do not have a randomly generated world. We want to design with care every place you will explore during your journey. Since the world is gonna be somewhat big, this can be a lot of work! That’s why we wrote some tools to automatize part of the process and make it easier.
Stacking gridmaps
The base node we use in Godot to build a level is a GridMap. It works similarly to a TileMap, but in 3D. If you are not familiar with gridmaps in Godot, we recommend to have a look at this great talk from Canopy Games during Go Godot Jam. The main strength of gridmaps is their efficiency: the engine draws all the meshes inside the grid as one object. They are also fairly easy to use with GDScript to build complex things from code.
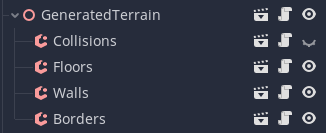
As we explained last week, we define the size of the grid to 1 x sqrt(2) x sqrt(2). We then place meshes in that grid and we can even rotate them if we need to. To make a level, we stack several gridmaps together and distinguish their purpose.
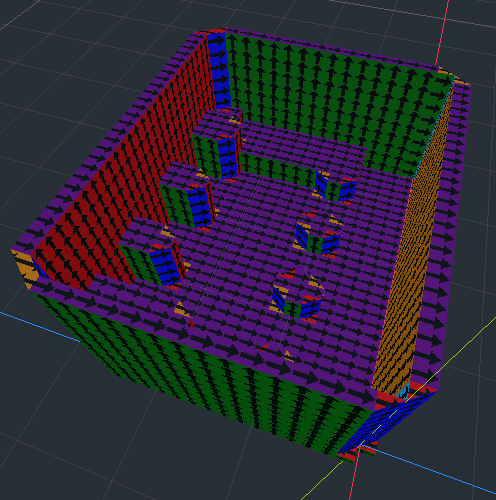
- Collisions. We use one gridmap to build the terrain. Its mesh library is composed of static bodies with collision shapes. This node remains hidden when running the game.
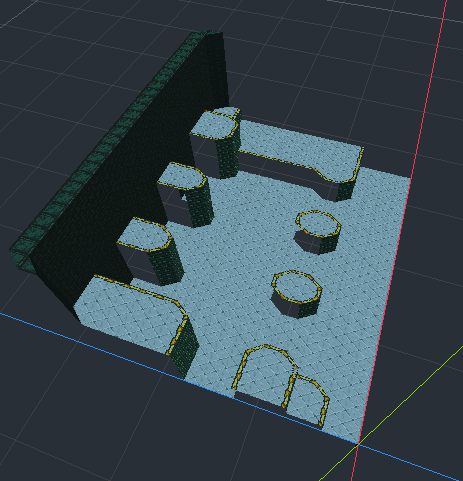
- Rendering. We use several gridmaps to display floors, walls and borders. Their mesh libraries is composed of many quad, plane and array meshes with different spatial material to account for the different possible textures. We explain below how we generate automatically this library from a tileset.
Mesh libraries
We created a mesh library for collisions that contains all the brick we need to shape the terrain of our world: a cube and triangular prisms for the diagonals.
We also made a base library for rendering, to display front walls, diagonal walls, square floors, triangular floors, etc. Once we have the base shape, we need to setup spatial materials to display albedo textures. But we won’t be using the same wall texture for the entire game, right? So we have to duplicate the meshes in the library and to create different materials, for example to display brick walls on one hand and stone cliffs on the other hand. We don’t want to make this duplication by hand so we wrote code to do it!
Converting a 2D spritesheet into a mesh library
First, we create a tileset with a grid of 16 x 16 pixels that contains our textures. Because tileset cannot hold additional information on their own, we attach it to a tilemap and add a script. In this script, we detail various data about our spritesheet. For each tile identifier, we specify the type (e.g. floor), the texture (e.g. grass), and the variation (e.g. upper or lower part of a wall) using switch and enums. This script is a little tedious to write, but we know of no better way at the moment—it will be much easier to do this in Godot 4.
We then write a generator that takes this tilemap as input. It starts by creating an empty mesh library resource. For each tile in the spritesheet, it looks at the base rendering mesh library for the correct mesh depending on the data, for instance to get the mesh corresponding to a triangular floor. It then duplicates the mesh, creates a spatial material and sets as albedo the texture from the tilemap. Finally, the new mesh is added to the generated library. In the end, we have a new library ready to be used!
To avoid ending up with one big resource file that will hamper loading performance, we plan to generate one library per zone in the game. We can also modify an existing library, simply by running again the generator. Quick tip to do that: restart the editor first and do not open any scene that uses this library until the generator finishes, otherwise we found out that the Godot cache messes up the resource overwriting.
Development progress
During the last couple of weeks, we were able to make a lot of progress. Most of our core systems and tools are functional and robust enough so that we can expand them quite easily as development goes on.
We can now safely say that we will meet our deadline and release a technical demo before the end of June! The raw content for this demo is indeed done, and we are now busy fixing bugs, polishing and completing some art assets. We will tell you more about what to expect for this demo in the upcoming devlogs, but here is below a first peek at how it currently looks with our recent work!
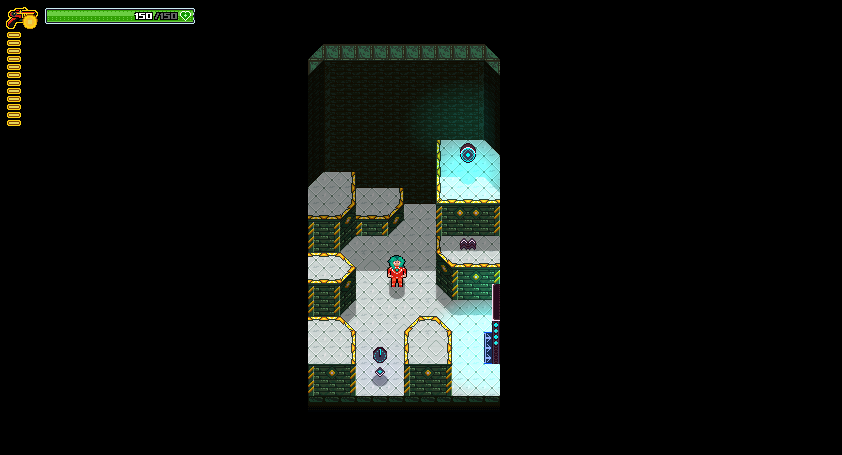
Next week, we will talk about how we generated automatically all the gridmaps of this post using a 2D data structure. Thanks for reading so far, and we will gladly reply to your comments!
See you next time!